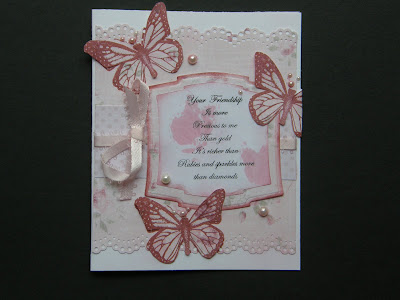
This Tilda Christmas stamp carrying a basket full of poinsetta's, just seems so perfect for Birthday wishes. I have quite a few friends who are celebrating birthdays between Christmas and New Years. I just don't want your special day to be over- looked.
So dear friends of mine, you know who you are so this posting is just for you.
If you happen to be visiting this site and it is your birthday as well. Let me know!
I am wishing you God's blessing today and through the next year.
With love Bonnie
Monday, December 28, 2009
Sunday, December 27, 2009
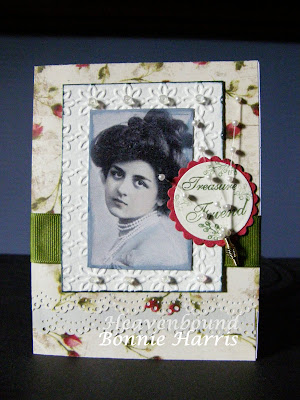
Treasured Friend
This is another photostamp that was stamped in black on glossy paper. Coloured with water based makers that was watered down like paint.Several backgrounds were used to enhance this lady. This stamp is from Oxford Impressions April in Paris plate.
This truly is a tribute to all of my treasured friends that are in my life.
Saturday, December 26, 2009
Christmas Past and Future
Is it hard for you to believe that in a twinkling of an eye that Christmas has come and gone!
So emotional isn't it. But what a wonderful day to celebrate not only that perfect gift of Jesus Christ, but to be able to spend it with precious family and best friends.
What treasures we have of precious memories of yesterday and bright hope for tomorrow.
This card is a glimmer of the Christmas past and a sparkle for Christmas Future.
I have used 4 different stamps to creat this collage card. Distress inks and stickles have faded and enhance the torn edged image.
Hope this inspires you to combine all the various stamps that you have in your stash of goodies.
Tuesday, December 22, 2009
In Stillness of the Season
Wanting just to say that I have appreciated everyone who has visited my site. This has certainly been a fun adventure and so inspirational as I continue to meet others that share the same love of card making as I do.
I don't know about you but I love being in the Stillness of the silence of special moments.
We are blessed so much in this country. We are warm, we are fed, we have an abundance and most of all the freedom to worship the new born King.
I hope that you are able to spend time in the stillness of this wonderful time of the year.
I pray that God will bless each one of you as you spend moments with friends and families.
It will be busy for us all for the next few days, so be safe in all that you do.
Merry Christmas to each of you.
Tuesday, December 15, 2009
Happy Birthday Sister
I am so blessed to have 2 wonderful sisters.They live miles away but will always be constantly in my heart.The wonderful saying of sisters from birth...best friends for a life time is so true.
Today is my youngest sister birthday....I think she is 30...something.
This card is for you Carol....our "Christmas Carol"...God has blessed her with angels wings to touch the hearts of so many.
Love Bonnie
Sunday, December 13, 2009
Friday, December 4, 2009
Season's Greetings
It is Friday and Christmas is in the air.I know that just north of us the snow is falling but not here...I love the snow.
Here is a Christmas Card from the wonderful stamps from Oxford Impressions. I love these stamps and of course the photo stamps.Colouring these images isn't that hard, I use waterdown felt markers.I save the styrofoam trays from the grocery store.They are a perfect, inexpensive pallette.Taking the colour you want,colour it on your tray and then with a thin haired brush, just keep watering it down til you get your desired shade.Test your colour on paper and when you are happy with it,then apply to your stamped image.It is better to start very light and then darken until get your desired shade. Try it...practice is sure to bring great results.
Enjoy every moment of the season and try to remember to savour the goodness of family and friends.
Saturday, November 28, 2009
Blogging Inspirations
There are so many sites that are so inspirational to me.I would like to share one of my favourites with you.
Jacque has been asked to be a designer with Magnolia Stamps.I am sure that you will agree that she is so amazing at what she puts her hand to.
http://jacquesmagnolias.blogspot.com/
Jacque has been asked to be a designer with Magnolia Stamps.I am sure that you will agree that she is so amazing at what she puts her hand to.
http://jacquesmagnolias.blogspot.com/
Congradulations on your success, and keep those great cards coming our way.
Wednesday, October 14, 2009
Footcare Website
Want you to be part of my new website for footcare services.
Let me know what you think.
http://www.wix.com/bonnieharris/footcare
Let me know what you think.
http://www.wix.com/bonnieharris/footcare
Thursday, October 8, 2009
Winged Magnolia
Adorable Magnolia,these little ladies are sure addicting.Each one is so unique.
I especially like the little feet that you can dangle over the edge of anything.
I used a butterfly cut out and embossed the rim with gold. I then nestled Tilda in that butterfly.Using a couple of my Martha Stewart punches I accented with the smaller butterflies and then the doubled scalloped border just below Tilda.
I thought the satin polka dot ribbon completed the whole card.
Wishing you all a very Happy Thanksgiving. We all have much to be Thankful for.
Monday, September 21, 2009
Spring Fever
This photo stamp is from "The Stampsmith"( one of my favourite stamp sites). I stamped this lady with black ink on semi-gloss paper then mounted it on background paper that was actally 2 co-ordinating papers.I like pulling different papers together by lightly using distress ink all around the edges. The side punch,added in white all around the photo stamp,also helps to bring the focus to the beautiful lady. I stamped the tulips on separate paper, coloured them and then cut out,adhering to the side of the image. You could easily do the same card, add different flowers according to the season.I know it is fall, but it seemed just like yesterday that I was watching my tulips coming into bloom. You are right!!!Where does the time go!!!!
Friday, September 18, 2009
Magnolia in Summer
Magnolia, these little girls are addicting. I used my copic markers.I also added a dot of translucent white to the eyes and cheeks to make her come alive.
After cutting the image out and I added her within an oval nestability, so that the legs would hang over. I added ribbons to the pigtails and punched out butterflies to nestle on her feet and in the upper corner.I think Magnolia is sitting of wishing for butterfly wishes.
I love the paper from Stampin Up. I co-ordinated the paper to match Magnolia's dress. I have just bought 3 more of these Magnolia rubber stamps so will share when completed.
Monday, September 14, 2009
House Mouse Chocolate Truffles
Sunday, September 13, 2009
Chocolate Truffles Mouse
I am in love with the House Mouse Rubber Stamps.I have put to use all of my distress ink techniques in this card. I did spotlight the mouse with my nestabilities scallop die. I created my own bling with the pearls and ribbon,to give some dimension. The sentiment inside the card reads "Nobody knows the truffles I've seen" How appropriate for this card. Hope you enjoy as much as I did making it
Sunday, September 6, 2009
Butterflies in Time
The entire summer has passed since my last post. I must confess that sleeping in a tent in northern Ontario is the my passions.A complete change from the busy world.Everything is silent, except for birds,slapping of the water and crickets.
My watch is hibernated,letting the warmth of the day or the stars determine the time.
Reflecting on those I hold close to my heart family and friends.Most important spending time in God's word and seeking His direction in all things.Thanks for letting me share this part of my life with you.
This collage style card is one of my favourite. Stamped in black. Coloured with distress inks,then torn and placed on co-ordinating paper.The brown scalloped strip was added. Co-ordinated buttons just completed the whole card. I think the robin egg blue and brown goes nice together.
Tuesday, July 7, 2009
Perfect Pearl Mists
I love the demo's from Tim Holtz.I just had to give the perfect pearl mist a try.
www.timholtz.com/vid_ppearl.htm
It works! I bought the empty misters from Micheals craft store. You can see that I sprayed my blended mists on a tag.Distressed the edges with distress black soot.Stamped assorted impressions in black.
I adhered the tag to reversible printed paper that I had folded up from the bottom.
The edge was punched with a Martha Stewart punch.A key hole embellishment and a purple ribbon to finish off.I glued the whole piece to a eggplant coloured card stock, that I had also punched the edge.
You have to try this.The effects of the pearl mist is beautiful.
Monday, July 6, 2009
Dreaming
Wondering what you might be dreaming of.I dream of lots of things,the perfect day, the perfect vacation, the perfect setting with families and friends.After stamping this little girl in black on glossy paper, I coloured her with watered down markers.
Using the embossing folder, I cut out the leaves and glued them beside the picture and mounted on printed co-ordinating paper.The sentiment was stamped and again I distressed all edges with a very light blue.
May all your dreams come true, today.
Sunday, July 5, 2009
Wonderful
I discovered the art of teabag folding.Very easy once you get the swing of it.After embossing on doubled sided- printed paper with the spiral embossing folder, I cut a circle from my scalloped nestabilities.I distressed the edges with Broken china distress ink, by using a make-up sponge.I love the distressed look.The large scalloped circle is cut into 8 pieces.
If you check out U-tube there are several technigues of "tea bag folds", with complete instructions.
Once folded each piece was clued to a tag, to complete the medallion.The center of the flower was filled with and embellishment.The edges of the tag, embossed and a ribbon added. The words Wonderful were added, a small flower and a tiny pearl clued in the middle. You could journal on the back or use as a gift card.
Friday, July 3, 2009
Hats off to all Teachers
With school out,my thoughts are with all of the teachers that deserve a good summer break.This photo stamp was given to me by a good friend when I first started stamping. I love it.It is coloured with watered down marker pens and then mounted on a printed background.The corner embellishment gives that antique look.
Thursday, July 2, 2009
The Blessing of Happy Children
Dragon Fly
Tuesday, June 30, 2009
Sunday, June 28, 2009
There's No Place Like Home
This card was made in a very simple way. The front door stamp was stamped on white paper with black ink. On most of my stamped images,I will use the lightest blue marker that I have, then I will ever so lightly colour all around the image. I find that this gives some extra depth.Then,I glued "Flower Soft" (heather)flecks on the area's where flowers should show.I coloured only the door knob in yellow.
Distressed lightly around edges.Attaching a Martha Stewart edging topped with a burgandy sheer ribbon. This makes a simple yet elegant card.
Puppy Love
Friday, June 26, 2009
Happy Birthday to You
I combined a chocolate printed paper and pink printed paper for the background.A polka dot ribbon and the white scallop edging helps to bring both colours together. The stamped image on white was done with sepia,inking my stamp well and then stamping off to fade the image.Martha Steward butterfly punch is very delicate and then the pearls just finishes the whole card off.Scalloped oval nestablities was popped to bring a litte dimension.Happy Birthday sentiment stamped with sepia.
Peonies
Thursday, April 23, 2009
House Mouse
It has been awhile since I have posted a new stamp.Life sometimes gets in the way of my creative moments.I have become a great Auntie 2 mores times, just in April.Making a total of 7.How blessed our family has been.Mom and Dad Cartwright would be so proud.Enough of that.......
Who doesn't love the House Mouse Stamps.I can't wait for the lilacs to bloom.The smell travels for miles and the deep purple are my favorite.This stamp was coloured with watercolours....a dragon fly embellishment added.
Thursday, March 12, 2009
Farm Fresh Chicks!
This card was made with my sister Carol,in mind. Yes she lives on a Hobby Farm. Her home is a Log Cabin.What an adventure to visit and while there you may see deer,moose or bear. They live on the wildside! What would a farm be without hens,chickens and eggs.
This Photo stamp. from Oxford Impressions is one of my favourites
Saturday, March 7, 2009
Ohoo...Marilyn
Friday, February 13, 2009
The Lord is My Shepherd
Wednesday, February 4, 2009
Sweet Tulips
This Card reminds me that Spring is not too far away.
A beautiful photo stamp from Oxford Impressions.Coloured with pastels and markers. Tulips were stamped,coloured,on white card stock.Then embossed with dotted,cuddlebug folder.The girl was placed to the side of the tulips.Pink sheer ribbon to complete.
Thursday, January 15, 2009
Lily
Lily was stamped on black glossy paper. This photostamp is just one of my favourites from The Stampsmith.Watered down inks were applied lightly to colour the image. Corners were punched out from blue cardstock and sponged lightly with black to give a vintage look. The background papers that I used are quite different and I like that look. I used various stamps on blue paper with black ink. After tearing the inside edge, it was then placed beside a chocolate brown printed sheet. Distressing the background papers like I did on the corners helps to bring the whole card together. All was completed with embellishements of a punched heart, a flower brad and a little glitter.
Sunday, January 11, 2009
Bleeding Hearts for Mom
My mother was an excellent gardener. The only plant she could never seem to grow was a bleeding heart. I think every section of her garden hosted a new plant every year, but no hope!
To this day when I see a bleeding heart in any form, I can't think but think of her.
This card is dedicated to her. The actual stamp is watercoloured. Using the oval nestablities, I centered the stamp. Added ribbon and corner embellisments to the corners.
To this day when I see a bleeding heart in any form, I can't think but think of her.
This card is dedicated to her. The actual stamp is watercoloured. Using the oval nestablities, I centered the stamp. Added ribbon and corner embellisments to the corners.
Friday, January 9, 2009
Stamping Friends
For the past 4 years ,I have meet with group of passionate stampers weekly. We share and motivate one another.Card making is the bond we have and a real highlight is when it is one of the members has a birthday. You never have seen such a frenzy when we give personalized cards to the celebrated one. I am not so sure who is the one most excited, the one receiving or the one giving. We all drool over each others cards in wonderment of "How did you do that"?What an amazing group these ladies are. This card,was given by me last night, to honour Brenda's birthday. I also would like to salute each of these wonderful friends who have all given me the inspiration that drives me to try something new.
Thursday, January 8, 2009
Here is another beautiful stamp. As you can see, I layered the background with different papers. Even though the papers are veried you can unified them by distressing all edges of all papers with a lightly inked make-up sponge. If you like the vintage look like I do, I often used a sepia or light brown. Go lightly first and increase to acquire the look you like. The chocolate brown cardstock was first stamped with Versa Mark,then embossed with pink.
Wednesday, January 7, 2009
Photo Stamps
You will notice that my favourite stamps are the photo stamps.
I love how real they look, once coloured with pastels, or water down ink.
It takes lots of practice to ink your stamp and to apply it to glossy paper. Each stamp has a mind of its own. Finding the right firmness when pressing on paper. It can be frustrating, but stick to it and you will love the results.
This stamp is from Oxford Impressions. The Rose background behind the stamp is from one of those beautiful tissue boxes. Anything that you love can be saved and used somewhere.
Card Creations
As I begin this new journey, I am excited to share, inspire and create a part of my life that has brought such an expression of my creativeness. What a wonderful hobby. Hope you will join me, at any time.
Subscribe to:
Posts (Atom)